 I couldn't find storage ottomans that are long enough for the end of my bed so I decided to build a couple myself. I made the pair of ottomans shown 7 years ago. Since I don't have many tools in the garage, I kept my design very simple with straight cuts that I could pay Home Depot to do for me. The first two cuts are free and any additional cuts are 25 cents. I decided to use OSB or Oriented Strand Board as my wood because it was the cheapest wood that I could find that was still strong enough to support the weight of me standing on it. Since, I planned on upholstering the ottoman anyway, it didn't matter what the wood looked like. This wood is normally used for roof decking or for a sub-floor.
 Oriented strand board, also known as OSB or waferboard, is an engineered wood product formed by layering strands (flakes) of wood in specific orientations. In appearance, it may have a rough and variegated surface with the individual strips (around 2.5 by 15 cm (approx. 1 in by 6 in) each) lying unevenly across each other.
Items that I needed for the project:
- 2 sheets of OSB
- 1 table leg
- Nails
- Screws
- Screwdriver
- Drill bit
- Staples for Staple gun
- Staple Gun
- batting for cushion
- Fabric for the exterior and interior
- Fishing line and
- Tapestry Needle for Tufting Clear
- jewelry bead
- Sewing Machine
I designed the ottomans to scale on graph paper. I drew out all the pieces I needed, indicating the length and width of each piece in order to have those pieces cut. I bought one table leg and had that cut down to 8 pieces, 4 for each ottoman. When I got home from the store, I laid out all the pieces for each ottoman, storing the extra pieces away so that I would not get confused.
I attached the sides to the bottom of the ottoman and then to each other with the nails. I predrilled two holes into the table legs using the drill bit and screwdriver. Then I attached them to the bottom of the ottoman with the wood screws. Next, I wrapped batting all around the ottomans and stapled in place. For the top of the ottoman, I drilled holes though the OSB where I wanted the tufting to be. Next, I added a few layers of batting to the top of the ottoman as well, making sure it was comfortable enough the sit on.
The next part was the upholstering of the ottomans. I laid out fabric and placed the top of the ottoman faced down (where the batting was on the bottom) over the fabric. I stapled the fabric to the underside of the ottoman top from the center, working my way out. Once I had stapled a complete row, I pulled the fabric tight to staple the bottom of the fabric to the board. I repeated for the sides.
Afterward, I decided to tuft the seat cushion. I took out my tapestry needle with some fishing line. I inserted the fishing line through the pre-drilled holes to create my tufting. Since I did not want buttons on my ottomans, I decide to use one clear jewlery bead instead. It is also possible to just slip the fishing line back through another hole if not using a bead or button to keep it in place. Once I pulled the thread through, I just reinserted the needle into another space that needed to be tufted until I was complete. I then took the lining fabric to cover up the edges of the fabric that was stapled previously and to cover up the tufting fishing line. It gave a more finished look.
Then I upholstered the ottomans itself. I wrapped fabric around the ottoman and then sewed the ends together. I made a lining for the ottoman and sewed that to the exterior fabric right sides together. When it was done, I slipped the fabric through the top of the ottoman and then stapled the excess under the ottoman, carefully working around the legs.
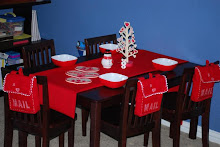
Here is the interior.

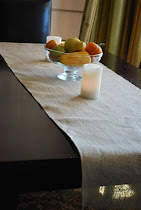
 It cost about $60 and took me about half a day to make and upholster these ottomans. I love the way the look, how they add additional seating, a way for my kids to climb up on the bed on their own, and how they add the much needed storage that we always need. I am updating my room so I just recently reupholstered these gray ottomans. Here is what they look like now: It is a creamy color with a nice texture and feel.
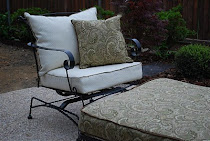
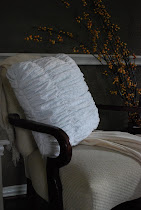
  I made some matching bolsters with leftover fabric.
 I didn't tuft the top like I originally had (with the gray) to see if I would like it with a smooth top, but I am not liking it as much as the tufted top so I will go back and re-tuft the lid.
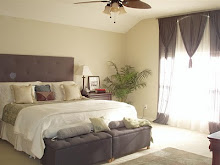
My next project will be reupholstering my head board I made also 7 years ago to coordinate with the room. I want a linen headboard with a espresso stained wood trim on the edge. Here is my bedroom in my old house. We have moved since then. I want to turn this headboard:
Into this:
This is pottery barn's Montgomery Upholstered Headboard

I may or may not tuft the headboard like my original. First, I will have to figure out how to make those wood cuts without a miter saw. I returned the miter saw I borrowed from my Dad. Perhaps, now is the time to invest in one. Maybe I can give my hubby some hints...odd gift, you think? When I was 22, I asked my dad to buy me a Mikita Cordless Screwdriver for Christmas. Call me strange, but it's still one of my favorite gifts and best tools that I own. I guess I am and always will be a carpenter's daughter.


.JPG)
.JPG)
.JPG)


.JPG)
.JPG)


.JPG)
.JPG)


.JPG)

Great post about building storage ottomans and storage footstools. I think these are the best types of footstools available due to the many benefits they have.
ReplyDelete